| Start | Text |
|---|
| 00:00:01 | Hey, what's up, everyone? Welcome back to the channel. First, I wanted to share
some exciting news. My wife and I are moving to Miami. This means I'm getting more space
to create more content, and more space for me to work
on my coin sorting robot designs. |
| 00:00:17 | However, right now,
all of my gear is packed up in boxes, including my 3D printer and all
of my electronic equipment. So this video is going to be a little bit different than the one I
promised in my last video. Now, Eagle-eyed viewers may have noticed
that my channel branding has changed. And in this video, I'm going to quickly go |
| 00:00:37 | over how I created my new branding
using mostly open source software. Eventually, the new branding will make its way over to the website
and perhaps even onto some merch. thecoinbot.com is still under
construction, but don't worry, I'm working hard to get it up
and running as soon as possible. Now, let's get back to the logo. |
| 00:01:05 | You may have noticed my previous logo
looked like a 3D rendering, and that's because I wanted to learn
more about Blender at the time. I have some 3D modeling and animation
experience from college, but that was about 20 years ago,
and mostly with 3D Studio Max and Maya. When I tried using the earliest version of Blender around then,
I found it to be really clunky. |
| 00:01:27 | But the new versions
are absolutely amazing. In just a few minutes, I was able to follow some tutorials
on YouTube and animate a character that the Blender team had
put together fully rigged. So I thought it would be easy to find a cute robot model online, import it
into Blender, and render my logo. |
| 00:01:46 | But as you might have guessed,
it wasn't quite that simple. The model I found was rigged for 3D
Studio Max, and unfortunately, the bones and kinematics didn't
translate over to Blender. So I ended up importing the OBJ version into Blender, but the rigging
just didn't come with it. So then I started researching tutorials |
| 00:02:06 | on how to rig a kinematic
character in Blender. I noticed that most of the characters had
organic bodies, were in their standard T-pose, had two arms, two legs,
a head, and five fingers. Now, these single mesh organic shapes are meant to be bent and squished
when they're animated. But the robot model I was now working |
| 00:02:27 | with had over 2000 individual parts,
all of them supposedly made of metal, and none of them are supposed
to bend, twist, or squish. So the tutorials I found for rigging
organic characters really weren't appropriate for the little robot
character that I had in mind. And that led me down a real rabbit hole
that took me a little over a month to wrap my head around and get
working the way I wanted. |
| 00:02:52 | Blender comes with some automatic rigging
features that attempt to associate the nearest bone to the mesh
that directly surrounds it. But since the robot was made
up of individual meshes. It had a really hard time figuring out
which mesh to associate with which bone. What I ended up doing was importing a skeleton with the correct number
of bones, then manually aligning every |
| 00:03:15 | joint and bone to the underlying mesh
objects and then painstakingly selecting and attaching each part
to the correct bone. The other thing that made this more
difficult was the fact that each of the over 2000 parts of the model that I
imported kept the names of the original primitive shape that was the original
starting point for creating it. So each part was called something like |
| 00:03:40 | Sphere 5 or Cylinder 652 or Box 325
and none of the object names had anything to do with their final shape or where
they ended up on the finished model. So to make my life just a little bit easier, I went through and renamed every
individual part so that similar parts from similar locations on the finished
model were grouped in the object selector. When sorted alphabetically, |
| 00:04:06 | using names like "left thigh" or "right
forearm" made selecting those individual parts if not easy,
then at least a little bit easier. And finally, through a rather painful
process of trial and error, rigging and testing, I eventually
got the right system down. Basically I had to associate each of the thousands of individual parts with
each of the hundreds of individual bones. |
| 00:04:33 | And after all of that I was finally able to attach the armature
to the skeleton and animate it. And after all that was finally finished, I was more than ready to render the thing
and get it posted to the YouTube channel. Just so I had something up there. I threw in some text in GIMP
and called it a day. |
| 00:04:50 | But ultimately I wasn't happy
with the finished result and it looked a bit sloppy to me and I really wanted
to change it to something better as soon as I got another spare
block of time to fix it. Well, it turns out that the move to Miami
is actually helping me to find some extra time away from projects I
would otherwise be working on. And with the proliferation of AI image
generators such as midjourney and stable |
| 00:05:14 | diffusion, the process of creating
a new logo could not be simpler. I simply went into midjourney and just
began typing prompts about designing a logo for a YouTube channel
about a coin sorting robot. But none of the creations that popped out of my first several attempts were
quite what I was looking for. They were either too dark, |
| 00:05:35 | they weren't cute enough, or they just
kind of looked sinister in some way. I was really looking for something that was a little more fun and I ended up
burning through all of my free credits. So when midjourney version five came out, I thought it would sign up for a paid
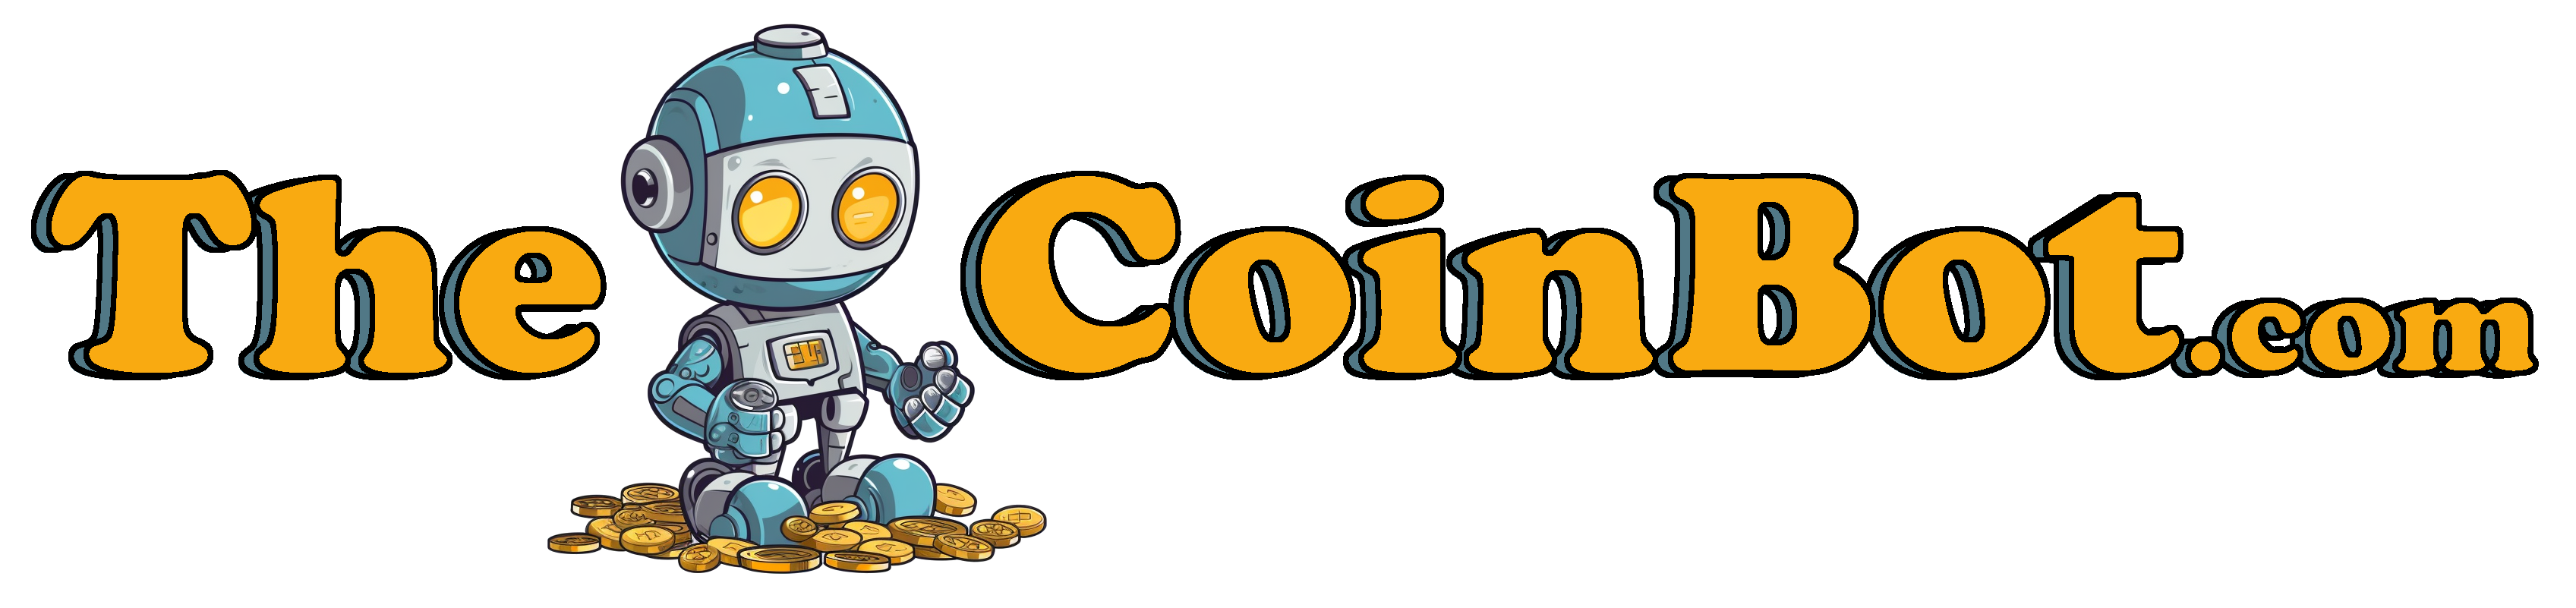
account and give it another go. The new subscriber powers allowed me |
| 00:05:54 | to try many more times and eventually I
refined the prompts to a fine degree and eventually ended up with something
that I'm totally happy with. Are you ready for the big reveal? Here's what I ended up with,
and I really love it. I love the color scheme and I think that will translate well to my other
branded products, including the website. |
| 00:06:19 | It's fun and vibrant and he's
really cute to boot. That prompted me to want to bring
the branding over to a website, and so I started playing around
with the finished logo design in GIMP. I ended up removing the white background
so that I could move the little mascot around and placed it
in a blank banner graphic. Then I started playing
around with the text. |
| 00:06:47 | Now on a white background,
I think these two blue colors really pop. But when I started to really lay out
the design of my final website, I saw that I needed to add
some color to the top banner. So I decided to go with this
light blue for the overall theme. And that meant that this gold color
here needed to be used for the text. And this is the final result. |
| 00:07:16 | I am so happy with it, and you can let me know down
in the comments if you like it too. So over the next few weeks and months, you'll see me building out the website,
adding features and content there, and hopefully creating a nice space
for all of us to share ideas. But for now, that's my two cent. |
| 00:07:32 | If you're fan of robots, tech,
or just cool logos, be sure to subscribe to my channel and
stay tuned for even more awesome content. You might also want to check out this
video that shows the challenges of opening my first 3D printer
and getting it working. Thanks for watching everyone. |